Welcome!!
So, you want to connect to our *ahem* infamous SHAW Minecraft server. First and foremost, to successfully connect you’ll need to be invited. The server uses a whitelist and will outright deny connections from players that, well, aren’t on the list.
That being said, there are two methods to connect to the server; which one you’ll need to use depends on your device. The mobile version and the Bedrock PC version (non-Java) allow you to add private servers directly. Console versions, such as the Xbox and Switch, require custom network settings to connect, but we have you covered there too.
Option 1 - Mobile App / Windows App
Congrats, you have the easiest path! To add the server, follow these steps:
- Open Minecraft, select ‘Play’
- Click on the ‘Servers’ tab
- Scroll to the bottom of the list and click the ‘Add Server’ button
- Enter the following details:
| Svr Name | SHAW Pvt Svr | ||
| Svr Address | bedrock.shawftware.net | ||
| Server Port | 19132 |
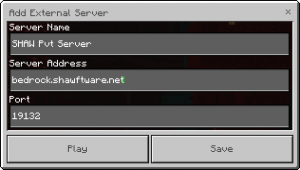
- Click ‘Save’
- Now the server will appear at the bottom of the servers tab!
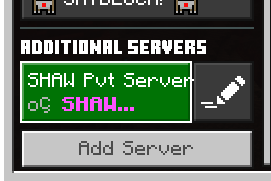
- Click ‘SHAW Pvt Server’ to join. Enjoy!
Option 2 - Custom Networking for Consoles
If you’re playing on a game console, you’ll need to adjust the console’s network settings to connect to the server. Consoles don’t (yet) officially support private Minecraft servers, so we’ll add a custom DNS that tricks the console into re-pointing one of the 5 official servers to our own. Sure, we could just host this on Realms, but that costs money.
Xbox One DNS Settings
To adjust DNS settings on the Xbox One, follow these steps:
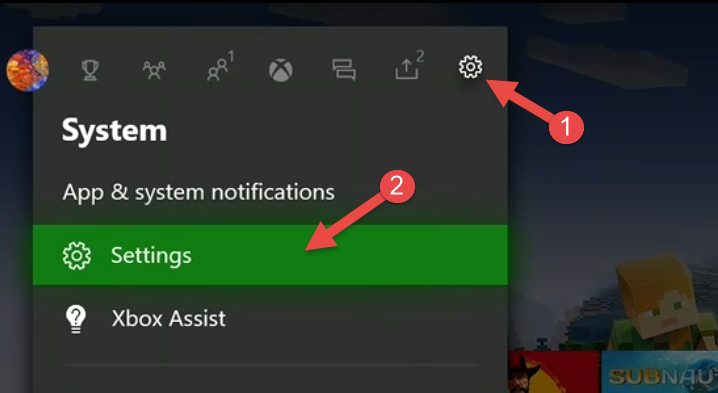
- Bring up the ‘Guide’ menu and navigate to the ‘System’ tab (the gear icon on the right)
- Select ‘Settings’
- Click ‘General,’ then ‘Network Settings’
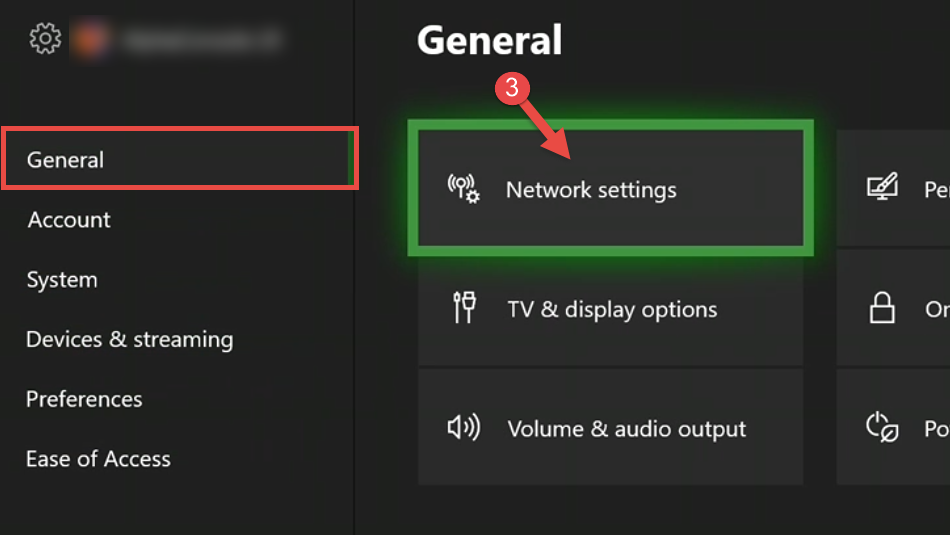
- Click ‘Advanced Settings’
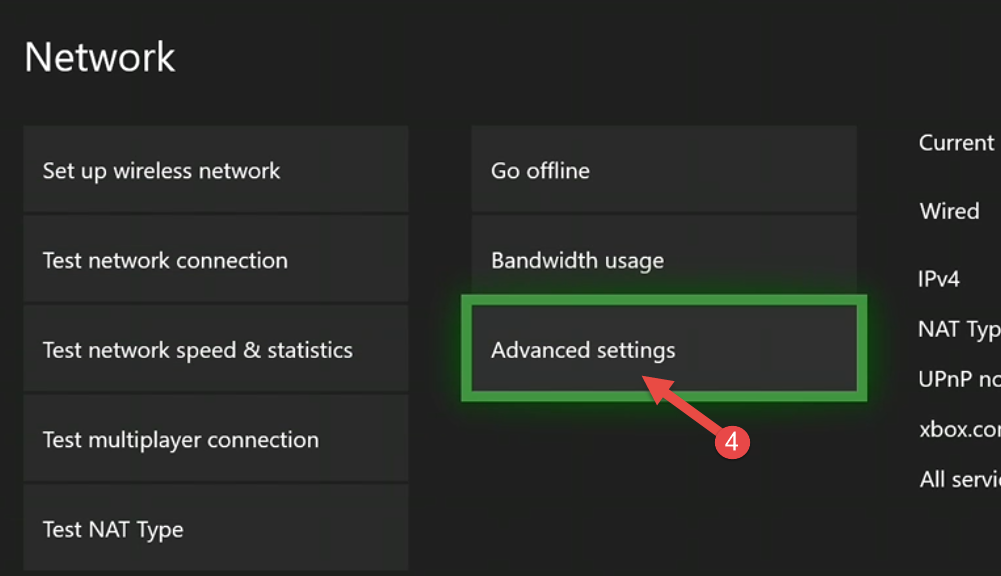
- Click ‘DNS Settings’
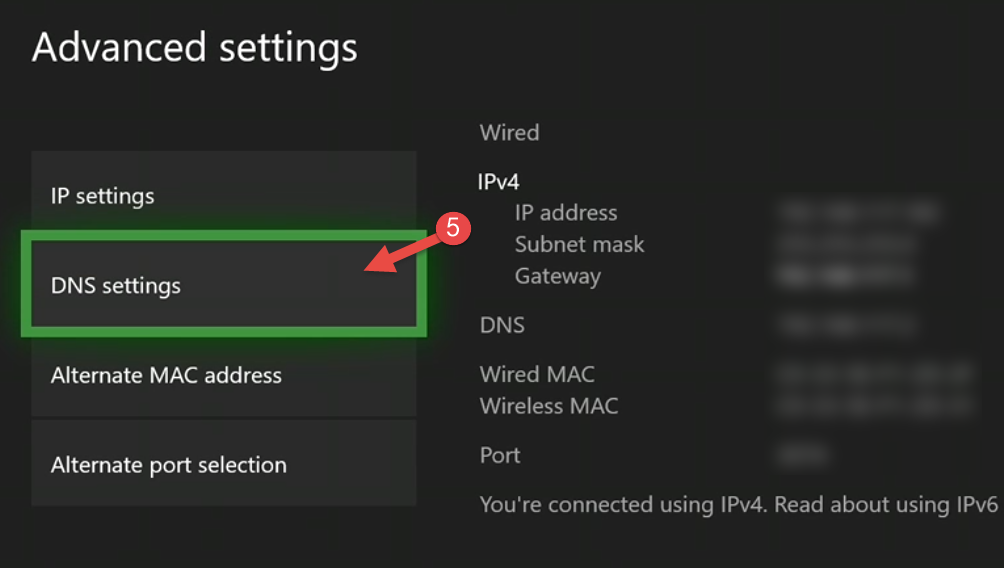
- Select ‘Manual,’ then enter these addresses:
| Primary DNS | 150.136.253.105 | ||
| Secondary DNS | 1.1.1.1 |
- When completed, your DNS settings will now be reflected on the ‘Advanced Settings’ screen.
- Back out of the advanced settings screen, and the console will test the new settings. You should see this screen if you’ve done everything correctly:
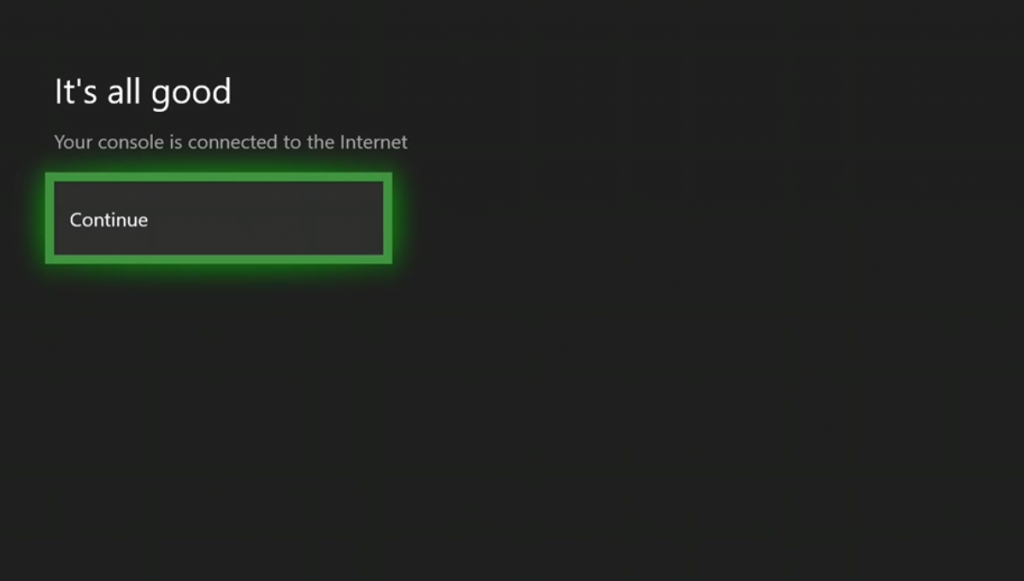
- Restart the console for the settings to take effect.
Nintendo Switch DNS Settings
To adjust DNS settings on the Nintendo Switch, follow these steps:
- Open ‘System Settings’ (the gear icon at the bottom of the first menu)
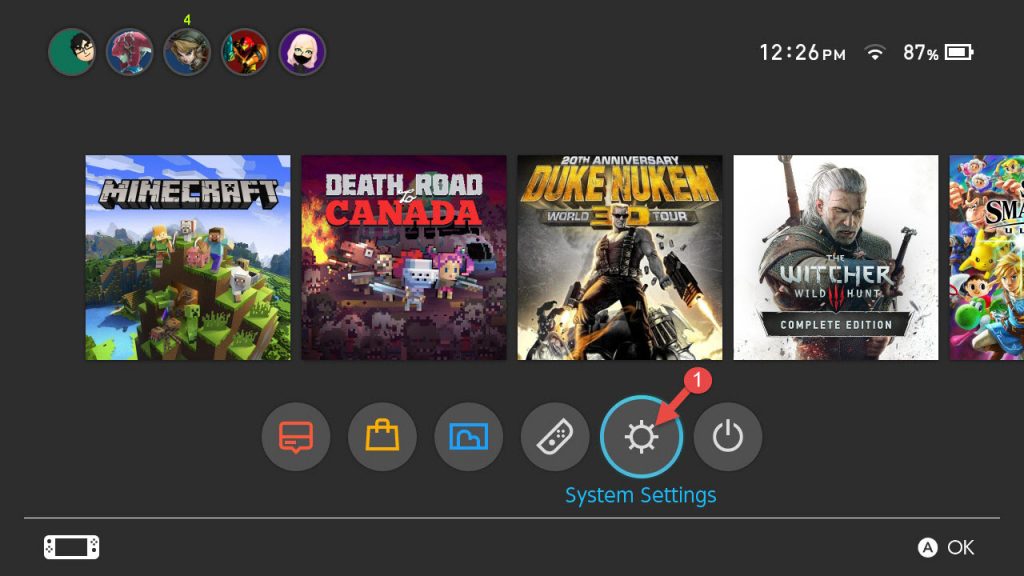
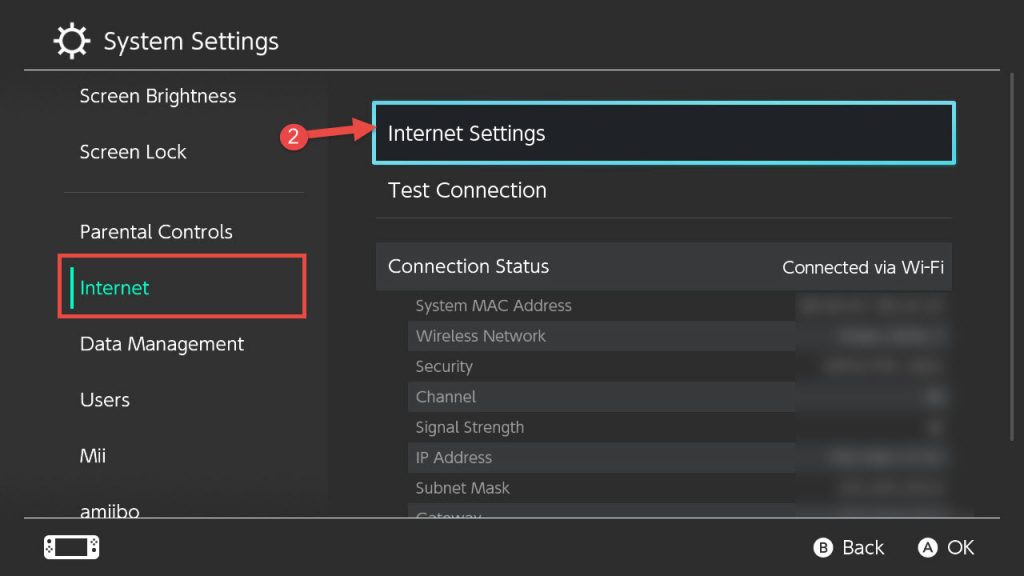
- Scroll down and select ‘Internet,’ then click ‘Internet Settings’
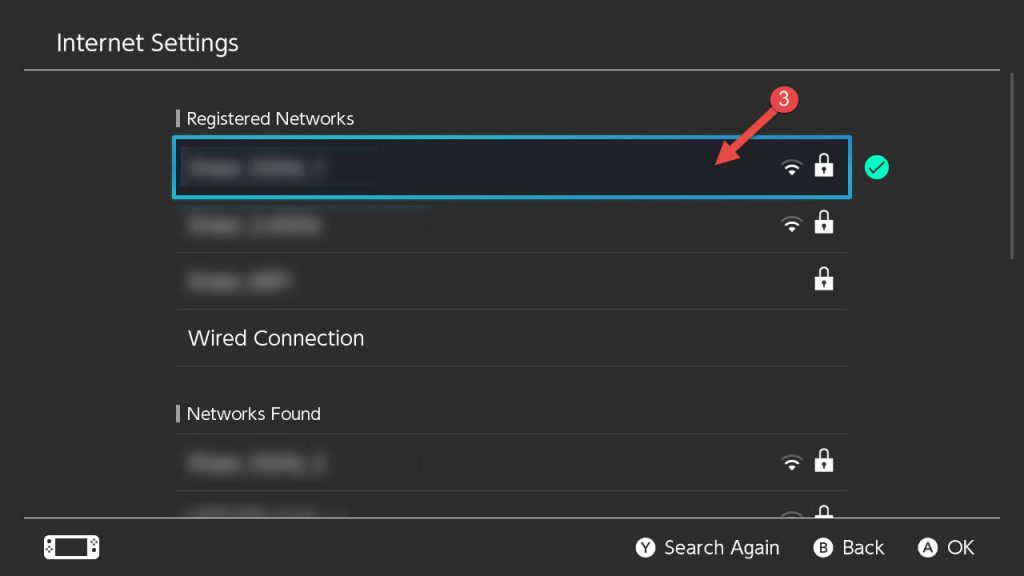
- Select the wireless network you’re currently connected to (the one with a green checkmark to the right)
- Select ‘Change Settings’
- Scroll down to ‘DNS Settings’ and choose ‘Manual,’ then enter these addresses:
| Primary DNS | 150.136.253.105 | ||
| Secondary DNS | 1.1.1.1 |
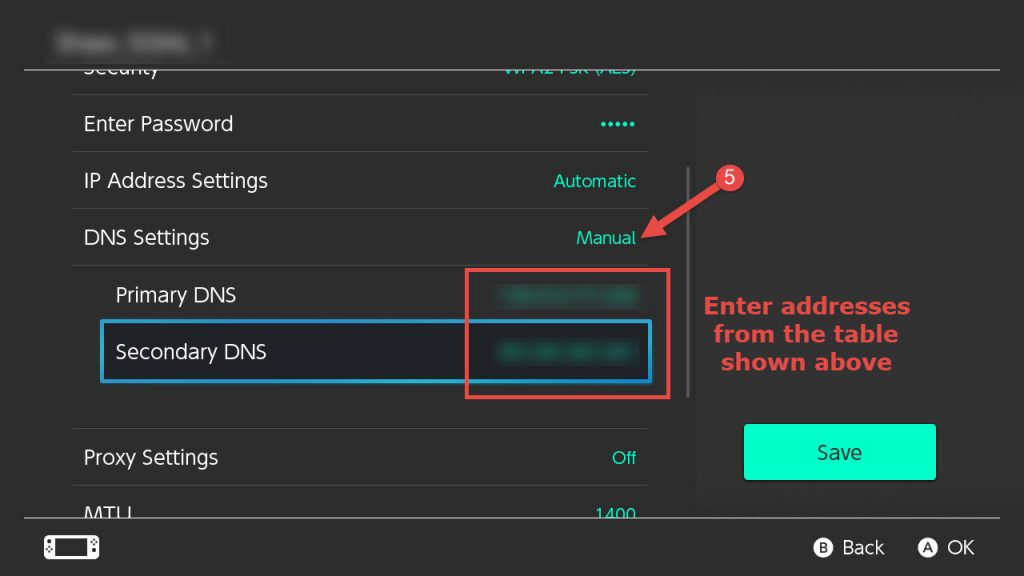
- Click ‘Save,’ then ‘OK.’
- Restart the console for the settings to take effect.
Once your DNS settings have been updated (and your console has been rebooted), you should be able to log onto the server.
- Open Minecraft and allow your Microsoft Account to connect (on the Xbox this is fast, on the Switch it can take anywhere from 30 seconds to a full minute).
- Select ‘Play’
- Click on the ‘Servers’ tab
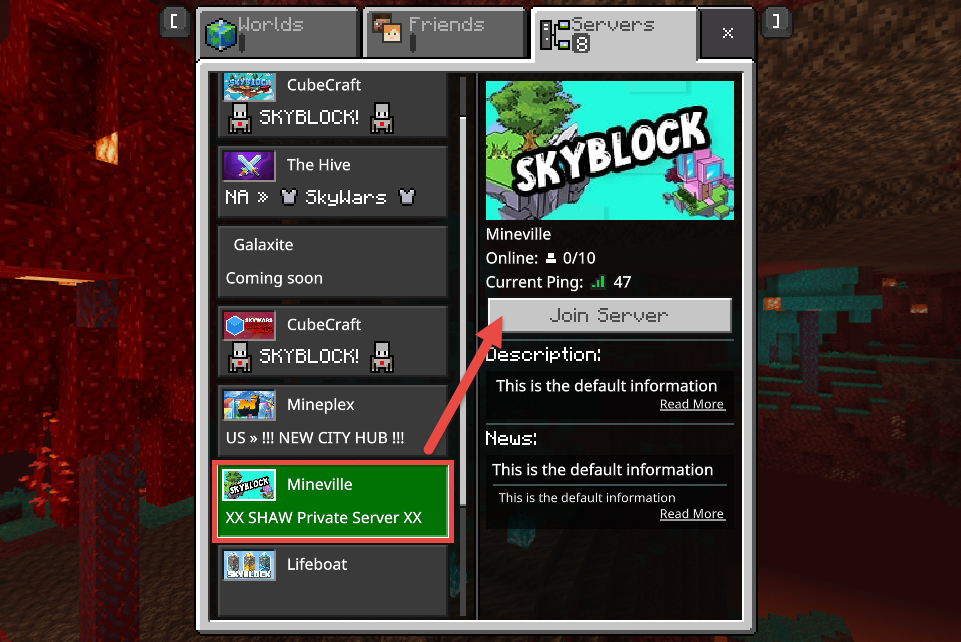
- Scroll down to ‘Mineville’
- If you’ve set up your DNS correctly, you should see Mineville say something like ‘SHAW Private Server’ instead of it’s usual message. Click the ‘Join Server’ button to join!
- Enjoy!!

